
Types of Textured Finishes
Splatter and Stomp Techniques
Walk into any modern Johannesburg home and you will likely see the growing appeal of textured wall paint texture as a design element. Among the more expressive options, splatter and stomp techniques deliver distinct results.
Splatter involves loading a brush with thinned paint and flicking the bristles toward the surface, producing irregular dots that resemble fine mist or coarse raindrops. Thicker paint creates larger specks while watery mixtures drift more widely.
Stomp techniques use a sponge or rag balled up and pressed, or stomped, onto the wall, lifting away parts of the wet coating.
- This creates a mottled, suede-like finish
- It works well in feature bedrooms and dining rooms
- It adds depth without dominating the room
Both approaches are forgiving for beginners, though practice on offcuts first remains advisable. Whichever route you take, the goal remains the same: a textured wall paint texture that feels intentional and inviting.
Sand Swirl and Skip Trowel
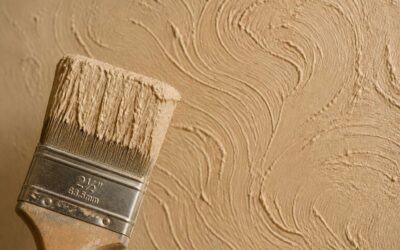
While splatter and stomp capture chaos beautifully, sand swirl and skip trowel offer a quieter kind of intrigue. Sand swirl involves pressing a joint knife into wet compound and dragging it in arcs, leaving faint ridges that catch light across the room. The effect suits long passages or a single feature wall.
Skip trowel feels almost archaeological. You apply a thin coat, then drag a trowel across it at random angles, skipping over sections to create a weathered, pitted appearance. It hides imperfections remarkably well! For a textured wall paint texture that suggests age without looking neglected, skip trowel is a strong option. I’ve used it to give rental flats a character they never had.
- Sand swirl adds subtle movement.
- Skip trowel delivers rustic depth.
- Both require dry conditions to cure evenly.
Venetian Plaster and Polished Looks
Venetian plaster is a different beast altogether. It asks for patience and a steady hand, but the payoff is a surface that feels like polished stone. The technique involves layering thin coats of lime-based plaster and burnishing them until they glow. This textured wall paint texture stands out for its depth; light seems to travel across the wall rather than simply land on it.
Polished concrete and limewash finishes offer similar sophistication. They bring a tactile quality that flat paint cannot match. Some homeowners worry about maintenance, but I have found that a sealed surface holds up well in busy households. The key is in the application. Work in small sections, keep your tools clean, and let each layer dry completely before adding the next. For those weighing their options, consider this:
1. Venetian plaster offers a smooth, marble-like sheen.
2. Polished limewash gives a softer, more matte appearance.
3. Burnished concrete delivers an industrial edge.
Each one brings its own character to a room. They all reward careful preparation and a willingness to embrace slight irregularities, which is part of the charm of any textured wall paint texture.
Tools, Materials, and Preparation
Texture Sprayers, Hoppers, and Air Compressors
A 5 HP, 20 CFM air compressor is the silent workhorse behind any reliable textured finish. Without steady airflow, a texture sprayer is just a heavy paperweight. Hoppers come in two practical forms: the gravity feed for patchwork and the pole gun for ceilings. Both demand consistent pressure, so verify your regulator before mixing anything. Preparation is where most jobs turn south. Mix compound in small batches, sift out every lump, and thin it to a pour that flows like warm honey. A proper textured wall paint texture relies on that consistency, otherwise the hopper spits and clogs.
The equipment list stays lean but non-negotiable:
- Texture sprayer with interchangeable nozzles
- Hopper gun rated for fine, medium, and coarse finishes
- Oil-free air compressor with a moisture trap
- Heavy duty 25 metre hose with quick couplers
Keep a 20 litre bucket of clean water beside you for rinsing the gun between refills. Tape off every socket and lay down drop cloths before you pull the trigger. Overspray is inevitable, so contain it early. That thoughtful prep turns a messy job into a clean, repeatable process.
Hand Tools: Trowels, Knives, and Sponges
A 15 cm stainless steel trowel is the backbone of most hand applied textures. Its flexibility controls the depth of each sweep. A stiff putty knife works for small patches and tight corners. Sponges shape the final surface, whether you want fine grain or deep craters. For a textured wall paint texture, these tools matter as much as the compound itself.
Before you dip a trowel, prepare the substrate. Fill holes, sand rough areas, and wipe dust. Use a damp sponge to test consistency on a scrap board. This saves time and avoids disappointment. Keep a hawk board nearby to hold material. It keeps your off hand free and your rhythm steady.
- 30 cm finishing trowel
- 10 cm pointing trowel
- 3 mm notched trowel
- curved sponge
- 5 cm putty knife
Each tool leaves a distinct imprint, so practice on scrap to see which pattern suits your space. When you master these hand tools, the final textured wall paint texture feels deliberate, not accidental.
Prepping Walls and Priming for Texture
Preparation defines the final result. A local study found that nearly 80% of texture failures trace back to inadequate surface prep. Before you open a single bucket, confirm the substrate is sound and free of loose paint.
Materials matter more than you expect. Choose a joint compound or pre-mixed texture product suited to your wall type. The correct primer seals porous drywall and stops the compound from drying unevenly. For a textured wall paint texture, this step separates a lasting finish from a temporary fix.
Here is a short prep checklist to follow:
- Alkaline resistant primer for new plaster
- Stain blocking primer for old water marks
- PVA primer for bare drywall
Wipe down the walls with a damp cloth, then allow a full day of drying time. A smooth, clean base gives you control over every pass. When you finally trowel on the compound, the textured wall paint texture feels intentional and permanent.
Step-by-Step Application and Technique Mastery
Spray Application and Pattern Control
The distance between your spray nozzle and the wall makes or breaks a textured wall paint texture. Hold it too close, and you get drips. Too far, and the pattern turns to dust. Professional finishers measure this distance every single time.
Start with a test surface. Adjust the air pressure until the spray pattern is consistent. Keep the gun perpendicular to the wall. Move your whole arm, not just your wrist. Smooth, even passes create an even finish across the entire surface.
Pattern control comes from discipline:
1. Work in small sections of about one square metre.
2. Overlap each pass by one third.
3. Maintain the same speed from start to finish.
Change the nozzle distance only when you want a different effect. Closer gives a tight splatter. Farther creates a loose orange peel. This step-by-step method delivers repeatable results with your textured wall paint texture.
Hand-Applying Knockdown and Skip Trowel
Hand-applying knockdown and skip trowel is a slower, more intimate way to work. You feel every ridge and dip through the trowel handle. The knockdown method requires a firm base coat, then flattening the peaks with a steel blade at a slight angle. Wait too long and the points set hard. Work too soon and you smear the whole surface. Skip trowel is different. You flick the trowel across the wall, leaving a random patchy texture that suits rustic Karoo interiors.
The order I follow:
1. Apply the mud in thin overlapping strokes.
2. Wait for the surface to dull slightly.
3. Knock down or skip according to the look you want.
Each pass changes the textured wall paint texture. The timing shifts with humidity and temperature. You learn to read the drying rate with your fingertips.
Working Around Corners, Ceilings, and Trim
Corners test your patience more than any flat expanse. I begin with the inside corner, pressing a thin bead of mud into the crevice with a narrow blade. Then I pull outward in short strokes, matching the surrounding textured wall paint texture before it skins over. Outside corners need a different touch. I run the trowel along the edge at a consistent angle, then soften the face so the ridge stays crisp but not sharp.
Ceilings demand the same rhythm but a lighter hand. Work in small squares, feathering each edge while the mud still glistens. Trim requires protection, but also a deliberate approach. I tighten the pattern as I approach the woodwork, letting the texture fade into a clean line. That transition is where most textured wall paint texture applications fail. The wall never looks finished if the edge is abrupt.
Drying Times and Second Coats
Drying times dictate the rhythm of the job. When the textured wall paint texture turns from glossy to matte, press a fingertip into a discreet spot. If it feels tacky but leaves no residue, the first coat is ready for a second pass. I often wait longer in Highveld humidity, where evaporation slows unreasonably.
Apply the second coat at right angles to the first. This builds an even depth across the surface. A few useful indicators guide me:
- The surface no longer drags under the trowel.
- Edges stay crisp when I feather them.
- The pattern holds its shape without slumping.
Once the second coat begins to set, resist the urge to touch it up. Working the textured wall paint texture too late pulls the peaks flat and ruins the relief.
Common Texture Problems and How to Fix Them
Fixing Runs, Drips, and Heavy Spots
Runs and drips happen when textured wall paint texture is applied too heavily or the mixture is too thin. Gravity pulls the material downward before it sets, leaving visible tracks. Heavy spots settle where the sprayer lingered too long or where the trowel pressed harder.
To fix these flaws, first let the area dry completely. Then scrape the excess down with a sharp knife. What remains is usually a flat patch that does not match the surrounding textured wall paint texture.
Here are steps to repair the damage:
1. Sand the dried run lightly with fine grit paper.
2. Reapply the texture with a light hand, matching the existing pattern.
3. Let the patch dry and assess if a second correction is needed.
The goal is to blend, not to erase. Work slowly, because rushed fixes create more runs than they solve.
Patching Damaged Texture Seamlessly
Cracks appear where the substrate moves. Holes form from furniture impacts or old mounting points. Patching damaged texture seamlessly starts with reading the existing pattern. A heavy skip trowel behaves differently from a fine sand swirl, and the repair must respect that difference.
Assess the damaged area before mixing anything.
- Run a fingertip across the damage to judge its depth.
- Compare the direction of the surrounding pattern.
- Choose the tool that will replicate that specific finish.
Shallow scrapes respond to a light skim coat pressed flat, then covered with fresh textured wall paint texture while still damp. Deeper cavities need a filler that shrinks minimally, otherwise the patch sinks below the wall plane.
Every repair alters the neighbouring textured wall paint texture slightly. That shift is unavoidable, but careful blending keeps it within the eye’s tolerance. Work across the boundary, not around it, so fresh material merges with the old. The final texture should read as one continuous surface.
Repainting Over Existing Textures
Repainting a textured wall paint texture is rarely a straight line to a fresh finish. The old surface was formed differently, by another hand. A previous coat laid on too thick creates a soft skin that cracks under the new layer. Dust, grease and humidity hide in the recesses. I have seen this become a blotchy sheen that extra coats will not fix.
Common problems with textured wall paint texture appear early:
- Flaking along the high points where the roller skips
- Burnished patches where the nap compressed the peaks
- Mildew staining that bleeds through the fresh coat
Repainting over existing texture differs from a flat wall. The nap must reach into every valley, and the coating must bridge the ridges without filling them. Some painters thin the first coat to let it settle, others use a stipple action. That difference matters! Either way, the old pattern remains visible, so the new finish must work with that depth.
When to Call a Professional vs. DIY
Textured wall paint texture is a stubborn feature. It can look marvellous for years, then a hairline crack appears in a corner. The cracks are the easy part. The real trouble is crumbling sections where moisture has eroded the substrate. For small, dry cracks, a DIY repair with filler and a stipple brush works well. But if the texture falls away when you press a finger to it, you are dealing with a bigger problem.
Call a professional when the wall is damp, when the texture contains asbestos, or when the entire wall needs to match. A professional has the spray equipment and the skill to blend. Do it yourself only for localised touch-ups on a sound wall. Here is a quick guide:
– Localised cracks: DIY
– Damp or crumbling texture: Professional
– Matching a full wall after a repair: Professional
A textured wall paint texture is not forgiving. If you force the issue, you will see the seam from across the room.
Cost, Maintenance, and Design Trends
Estimating the Cost of Texturing a Room
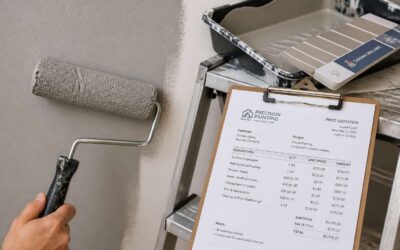
Estimating the cost of texturing a room starts with the area size and the complexity of the chosen pattern. For textured wall paint texture, expect to pay between R50 and R120 per square meter in South Africa, depending on labor and materials. Small rooms with high ceilings often push the price higher because scaffolding and cutting in around coving add hours.
Maintenance stays simple but demands a gentle hand. Dust settles into the recesses of the texture, so use a soft brush attachment on a vacuum rather than a damp cloth. The paint layer itself acts as a sealant, which means most spills wipe away without leaving ghosts. However, remember that repainting a textured wall paint texture always requires a thicker roller nap to avoid leaving bare pits.
Current design trends lean toward low-sheen finishes in greige and warm sandstone tones. These shades mask imperfections and soften harsh light. When budgeting, factor in these popular choices:
- Base coat and topcoat materials
- Rental or purchase of application tools
- Surface prep and primer for bare drywall
- Labor if you skip the DIY route
Costs rise sharply for repairs, so measure twice before you commit. Textured wall paint texture remains one of the most forgiving finishes for hiding cracks, but the price of entry is honest planning.
How Texture Hides or Highlights Wall Imperfections
A crack that runs along a ceiling joint can become invisible under the right finish. The same crack becomes impossible to hide under the wrong pattern. From what I have seen on site, most homeowners fixate on the pattern itself while ignoring the condition of the wall beneath. Textured wall paint texture works as camouflage when the pattern depth exceeds the flaw size. A heavy skip trowel hides uneven drywall joints, while a light sand swirl only draws the eye to them. Light angle matters just as much.
Check these conditions before committing:
- Glare from a northern window exposes roller marks.
- Low sun in a passage highlights every trowel edge.
- Artificial downlights exaggerate ceiling waviness.
Some textures conceal flaws. Others expose them. The wall’s existing condition should dictate the pattern selection, not fashion.
Choosing the Right Texture for Each Room
The cost of textured wall paint texture in South Africa varies with the pattern’s complexity and the room’s square meterage. A skip trowel stays affordable; a Venetian polish is not. The room’s purpose shifts the budget, a kitchen endures more abuse than a guest bedroom.
Maintenance follows the texture. Deep patterns hold dust and demand careful cleaning. A light sand swirl wipes down easily, while a heavy stomp traps grime. Choose a pattern that survives your lifestyle.
Design trends lean toward subtlety. Coastal homes prefer a soft knockdown; urban lofts embrace rougher contrasts. The room dictates the choice:
– Bedrooms: fine sand swirl for a calm finish.
– Bathrooms: smooth trowel to resist moisture.
– Hallways: skip trowel to hide daily wear.
Textured wall paint texture should serve the space, not just the fashion. That’s a truth worth living with.The cost of textured wall paint texture in South Africa varies with the pattern’s complexity and the room’s square meterage. A skip trowel is affordable; a Venetian polish is not. The room’s purpose shifts the budget, a kitchen endures more abuse than a guest bedroom.
Maintenance follows the texture. Deep patterns hold dust and demand careful cleaning. A light sand swirl wipes down easily, while a heavy stomp traps grime. Choose a pattern that survives your lifestyle.
Design trends lean toward subtlety. Coastal homes prefer a soft knockdown; urban lofts embrace rougher contrasts. The room dictates the choice:
– Bedrooms: fine sand swirl for a calm finish.
– Bathrooms: smooth trowel to resist moisture.
– Hallways: skip trowel to hide daily wear.
Textured wall paint texture should serve the space, not just the fashion. The right selection pays for itself over time.

0 Comments