
Choosing the Right Wall Paint Design
Understanding Different Wall Paint Styles – Exploring various wall paint design options such as accent walls, geometric patterns, murals, and textured finishes
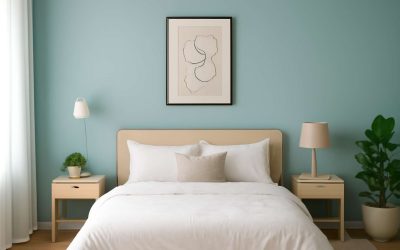
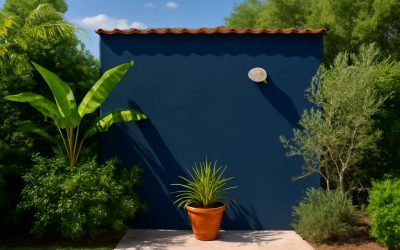
When delving into how to wall paint design, understanding the array of styles available can turn a mundane space into a masterpiece of sophistication. It’s astonishing how a simple shift in paint technique can redefine the entire ambiance of a room. For those seeking to make a statement, accent walls are a tried-and-true method—adding a splash of bold colour or a contrasting hue creates instant drama without overwhelming the senses.
Alternatively, exploring geometric patterns offers a contemporary flair, transforming walls into canvases of modern artistry. Murals, on the other hand, evoke a sense of grandeur and personal storytelling, turning your wall into a focal point of conversation. For a tactile appeal, textured finishes—such as plaster, stucco, or faux brick—bring depth and character that mere flat paint cannot achieve. By understanding these different wall paint styles, you can master how to wall paint design that perfectly complements your space’s personality and your unique aesthetic sensibilities.
Factors to Consider Before Starting – Room size, lighting, existing decor, color schemes, and personal style preferences
When embarking on the journey of how to wall paint design, understanding the nuanced factors that influence your choice is essential. The size of your room can dramatically shape the impact of your chosen paint style—small spaces often benefit from lighter shades and reflective finishes that create an illusion of openness. Conversely, larger rooms allow for bolder, more intricate designs without feeling overwhelming.
Lighting plays a pivotal role, as natural and artificial light can alter the perception of colours and textures. A room bathed in sunlight might showcase warm, inviting hues, while a dimly lit space demands cooler tones to maintain balance. Existing decor and color schemes should also inform your decision—harmonizing your wall paint with furniture, rugs, and accessories can elevate the overall aesthetic. Personal style preferences, whether leaning toward minimalist elegance or eclectic vibrancy, serve as the compass guiding your how to wall paint design choices—making the process both a creative adventure and a reflection of your personality.
Preparing Your Walls for Painting
Cleaning and Repairing Walls – Removing dirt, filling holes, and smoothing surfaces
Before the first brushstroke of your creative journey into how to wall paint design, the canvas must be prepared with care. Walls, often overlooked as mere backdrops, hold secrets in their surface—imperfections that can distort even the most inspired color choices. A thorough cleaning with a gentle cloth or mild detergent removes dust, grease, and any lingering residues that might sabotage your masterpiece.
Next, focus on repairing and smoothing the surface. Small holes and cracks, like scars from past stories, need filling with spackle or joint compound. Once dry, gently sand the area to create a seamless landscape where paint can breathe freely. This meticulous preparation transforms an ordinary wall into a pristine palette, ready for your vision to unfold. Remember, in the realm of how to wall paint design, a well-prepared surface is the foundation of brilliance—an invisible yet vital step that ensures your artistic expression endures and dazzles for years to come.
Choosing the Right Primer – Types of primer and their benefits for different wall surfaces
Choosing the right primer is a crucial step in understanding how to wall paint design with finesse. The appropriate primer can transform a dull, uneven surface into a flawless canvas, ensuring your chosen paint adheres properly and lasts longer. In South Africa, where climate and wall surfaces vary dramatically, selecting the correct primer becomes even more vital.
There are several types of primer, each tailored to specific wall surfaces and conditions. For instance, oil-based primers excel at blocking stains and sealing porous surfaces, making them ideal for older walls or those with water damage. Water-based primers, on the other hand, are eco-friendly, quick-drying, and suitable for new drywall or painted surfaces needing a fresh coat.
- Bonding primers for tricky surfaces like tile or glossy finishes
- Stain-blocking primers to prevent bleed-through from previous paint or stains
- Multi-purpose primers that work across a variety of wall types, simplifying the process
Understanding these nuances helps you achieve a superior wall paint finish, bringing your wall art ideas to life with clarity and durability. When exploring how to wall paint design, choosing the right primer is the secret to a seamless, professional-looking outcome that endures over time.
Gathering Essential Painting Tools and Materials
Paint Types and Finishes – Matte, satin, semi-gloss, and high-gloss options
Transforming a space begins with the quiet promise of a brushstroke—an act of magic that turns blank walls into stories waiting to be told. When exploring how to wall paint design, gathering the right tools and understanding paint types become the foundation of your journey. A high-quality roller, an assortment of brushes, painter’s tape, and a sturdy ladder are essential companions in this artistic voyage, ensuring precision and ease. The selection of paint is equally vital; the right finish can elevate your design from ordinary to extraordinary.
Paint finishes come in a variety of textures and sheens, each whispering a different mood into the room. Matte finishes absorb light, creating a velvety backdrop perfect for hiding imperfections. Satin offers a gentle sheen, adding a touch of elegance without overwhelming the senses. Semi-gloss paints are resilient and reflect a subtle lustre, ideal for kitchens and bathrooms where durability matters. For a bold, reflective statement, high-gloss paints shine brightly, adding depth and a contemporary edge to your wall design. Choosing the right finish depends on your desired ambiance and the specific needs of each space.
Necessary Tools – Brushes, rollers, painter’s tape, drop cloths, level, and stencil materials
Embarking on the journey of how to wall paint design is an art form that demands more than just a splash of colour and a prayer. It’s about arming yourself with the right arsenal of tools—think of it as your paint battalion ready to conquer any wall with finesse. The foundation of a flawless finish begins with gathering essential painting tools and materials, transforming what could be a messy ordeal into a symphony of precision and creativity.
First up, a good-quality brush and roller are your best friends—these are the magic wands that turn blank canvases into stunning visual stories. A sturdy painter’s tape ensures sharp lines and crisp edges, preventing unintentional masterpieces on your trim or ceiling. Drop cloths become your shield against paint splatters, while a level guarantees your geometric dreams stay perfectly aligned. For those daring mural ideas or textured finishes, stencil materials come into play, turning walls into works of art.
Here’s a quick breakdown of must-have tools for how to wall paint design:
- Brushes of various sizes for detail work and touch-ups
- Rollers for smooth, even coverage over large surfaces
- Painter’s tape to create clean lines and prevent bleeding
- Drop cloths to protect floors and furniture from stray paint
- A level to ensure your lines stay straight and aesthetic
- Stencil materials for intricate patterns or artistic accents
Equipping yourself with these essentials transforms a daunting task into a manageable, even enjoyable, endeavor. After all, mastering how to wall paint design isn’t just about choosing the right colours, but also about understanding the tools that bring your creative vision to life with precision and style. Ready to roll up your sleeves? Let’s dive deeper into the world of wall painting mastery—because every wall deserves a touch of brilliance.
Techniques for Creating Stunning Wall Paint Designs
Basic Painting Techniques – Cutting-in, rolling, and blending
When it comes to how to wall paint design, mastering basic painting techniques is essential for creating visually stunning results. The foundation of a flawless paint job often hinges on simple yet effective skills like cutting-in, rolling, and blending. Cutting-in involves using a brush to outline edges and corners with precision, ensuring clean lines that make your design pop. Rolling, on the other hand, speeds up coverage and helps achieve a smooth, even finish—think of it as the backbone of your wall transformation. Blending seamlessly between different colours or textures can elevate a plain wall into a masterpiece, especially when done with care and patience.
To enhance your skills, consider practicing these techniques on a scrap piece of drywall before tackling the main project. For intricate designs or textured finishes, using painter’s tape and stencils can make all the difference. Remember, the secret to how to wall paint design lies in patience and attention to detail—so don’t rush! When executed correctly, these basic painting techniques can turn a dull wall into a captivating focal point, making your space uniquely yours.
Advanced Design Methods – Stripes, geometric patterns, stenciling, and sponge painting
When it comes to how to wall paint design, the magic lies in pushing beyond the basics and embracing advanced techniques that turn walls into art. Stripes, geometric patterns, stenciling, and sponge painting are your secret weapons for creating stunning visual effects that captivate and intrigue. These methods allow you to inject personality and flair into any room, making your walls far from ordinary. For instance, bold stripes can elongate a room’s height, while intricate stenciling adds an air of sophistication that screams ‘professional’.
Experimenting with these advanced design methods can be surprisingly straightforward. Use painter’s tape to achieve crisp lines for stripes or geometric shapes, and consider stencils to add intricate motifs without needing an art degree. Sponge painting, on the other hand, offers a textured finish that mimics natural elements like stone or foliage—perfect for adding depth and character. Remember, patience is your best friend here. Practice on scrap drywall and take your time to perfect your craft. With each stroke and pattern, your journey to mastering how to wall paint design becomes more rewarding and awe-inspiring.
Using Tape for Precise Lines – Tips for clean, sharp edges
Mastering the art of how to wall paint design hinges on precision and patience. When employing tape for creating clean, sharp edges, the devil truly is in the details. Carefully press painter’s tape along the boundary lines—smooth out any air bubbles to prevent bleeding and jagged edges. This meticulous step ensures your design remains crisp and professional-looking, transforming a simple wall into a striking visual statement.
For geometric patterns or stripes, use a level or straightedge to keep lines perfectly aligned. Applying painter’s tape in parallel or intersecting configurations can produce complex, eye-catching motifs. Once the tape is secured, proceed with your chosen paint color, and remove the tape before it dries completely. Doing so reveals pristine lines that elevate your room’s aesthetic. These techniques for creating stunning wall paint designs are surprisingly straightforward but demand an unwavering commitment to precision. The result? Walls that breathe personality, sophistication, and a sense of artistry—proof that how to wall paint design is truly an act of deliberate mastery.
Step-by-Step Process for Painting Wall Designs
Planning Your Design Layout – Measuring, sketching, and mapping out the design
Embarking on the journey of how to wall paint design begins with meticulous planning. A well-thought-out design layout transforms a mundane space into a captivating masterpiece. Start by measuring your wall dimensions precisely—this step is crucial to avoid surprises later. Use a tape measure and jot down the measurements for height, width, and any architectural features that might influence your design.
Next, sketch your vision on paper or use digital tools to map out the layout. This step helps visualize the final look and ensures proportions are balanced. For more complex patterns like geometric designs or murals, creating a scaled template can be invaluable. Consider marking key points lightly on the wall with a pencil, so you can easily align your paintwork and maintain symmetry.
- Measure the wall carefully, noting dimensions and unique features.
- Sketch your design on paper, incorporating scale and pattern details.
- Map out the design directly onto the wall with light pencil marks, using a level to keep lines straight.
Mapping out your design with precision guarantees that your creative vision comes to life just as imagined, making your project not just a paint job, but a true art installation. Mastering these initial steps in how to wall paint design sets the stage for a stunning, professional finish that lasts for years to come.
Applying Base Coat – Choosing the right color and applying an even base
Before you unleash your inner Picasso, mastering the art of applying the base coat is essential—think of it as laying the foundation for your wall’s personality. Choosing the right color isn’t just about matching your curtains; it’s about setting the tone for the entire room. Bright colors can energize, while muted tones lend a sense of calm. Once you’ve selected your hue, it’s time to apply an even layer of paint, which is easier said than done without the right tools and technique.
Start by stirring your paint thoroughly—nothing kills a design faster than uneven coverage. Using a roller with a high nap for textured finishes or a brush for detailed edges ensures smooth application. For larger surfaces, a roller is your best friend, while brushes are handy for corners and edges. Remember, a well-applied base coat acts as a primer for your decorative elements and prevents paint from soaking into the wall unevenly.
To guarantee precision, consider dividing your wall into sections with painter’s tape or light pencil marks. This prevents accidental drips and creates a professional look. If your design involves multiple colors or patterns, let each coat dry completely before moving on — patience is key when learning how to wall paint design. When you’re finished, step back, admire your work, and prepare for the next phase of transforming your space into a masterpiece!
Creating the Design – Techniques for detailed work and finishing touches
Transforming a blank wall into a captivating masterpiece requires more than just selecting colors; it demands precision and artistry. Once the base coat is dry, the real magic begins—learning how to wall paint design with intricate techniques that elevate your space from ordinary to extraordinary. The key lies in mastering detailed work and finishing touches that bring your vision to life.
Start by sketching your design lightly with a pencil or using painter’s tape to outline patterns. For delicate details, fine brushes are your best allies—think of them as the brushstrokes of a painter’s symphony. Layering colors strategically, blending edges seamlessly, and adding highlights or shadows will give depth to your design. Remember, patience is crucial as each layer dries, ensuring crisp and clean lines. For clean edges, use painter’s tape with a steady hand, and always remove it before the paint fully dries to prevent smudging.
When you’re nearing the finish line, focus on the finishing touches—adding subtle shading or textured accents can dramatically enhance the overall effect. Whether you’re creating bold geometric shapes or subtle patterns, understanding the nuances of how to wall paint design ensures your project stands out with professional finesse. It’s these meticulous details that turn a simple wall into a true work of art, captivating anyone who enters the room.
Tips for Achieving Professional-Looking Results
Maintaining Clean Edges – Using painter’s tape effectively
Achieving professional-looking results in how to wall paint design hinges on the mastery of maintaining clean edges. The secret lies in the artful use of painter’s tape—an unassuming hero that transforms a good paint job into a work of art. When wielded with patience and precision, painter’s tape ensures sharp, crisp lines that elevate your wall design, whether you’re creating geometric patterns or delicate stripes.
Before you begin, thoroughly clean the surface and ensure it’s dry; this maximizes tape adhesion and prevents bleeding. Press the tape down firmly along the edges you wish to keep pristine, smoothing out air bubbles and wrinkles. For added accuracy, use a level to align tape strips, especially when designing complex patterns.
- Remove the tape slowly and at a 45-degree angle—this prevents smudging and preserves the clean lines of your design.
These simple yet effective techniques are vital for anyone eager to learn how to wall paint design that looks polished and professional. When combined with a steady hand and meticulous planning, the results will speak volumes, transforming any space into a masterpiece.
Layering and Drying Times – Ensuring smooth transitions and avoiding smudges
Achieving a seamless, professional finish in your wall paint design hinges on understanding the delicate dance of layering and drying times. The moment you lay that first stroke, the magic begins, but the true mastery lies in patience. Rushing the process invites smudges and uneven transitions—foes to your artistic vision. Allow each layer to dry thoroughly before applying the next; this ensures a smooth, cohesive look that elevates your wall painting endeavor.
For intricate designs, such as geometric patterns or textured finishes, patience becomes your most trusted ally. Employing a systematic approach—like waiting at least 2-4 hours between coats—can dramatically enhance the final result. Remember, layers that are applied too thickly or prematurely can cause bleeding and compromise your beautiful, clean lines. The art of knowing when to proceed is what separates a novice from a seasoned creator in how to wall paint design.
- Start with a well-ventilated room to expedite drying times.
- Apply thin coats, allowing ample drying time in between—usually a minimum of 2 hours for water-based paints.
- Use a fan or open windows to facilitate airflow, but avoid direct drafts that might disturb the paint’s settling process.
Mastering layering and drying times transforms a simple wall into a canvas of sophistication. When each layer is given its moment to set, the transitions become fluid and flawless—an essential secret in how to wall paint design that looks truly professional. Patience, precision, and a keen eye for detail are the true artisans behind a masterpiece destined to captivate.
Handling Mistakes – Correcting errors and touch-ups
Even the most skilled painters encounter mishaps along the way, but knowing how to wall paint design mistakes can transform a potential disaster into a masterpiece. When errors occur, swift and strategic correction is essential to maintain that professional look you’re aiming for. The key is to approach touch-ups with patience and finesse—dabbing carefully with a fine brush can seamlessly blend imperfections into the overall design. Remember, a gentle hand and the right tools make all the difference.
For small mistakes like paint smudges or uneven edges, use a damp cloth to wipe away excess before reapplying a touch of paint. If you’ve accidentally painted over a line or pattern, employ painter’s tape and a steady hand to restore sharpness and precision. Sometimes, layering a thin, fresh coat over the flaw and allowing it to dry thoroughly is the best way to perfect your work. This method ensures your final result is as flawless as a professional’s touch.
Handling mistakes with confidence enhances your ability to achieve the desired aesthetic. Embrace the imperfections as part of the artistic process—each correction brings you closer to how to wall paint design that captivates and impresses. Skilled touch-ups can elevate your wall painting project from amateur to artful, creating a space that tells your unique story with every brushstroke.
Post-Painting Maintenance and Care
Cleaning Painted Walls – Safe cleaning methods based on paint type
Once the vibrant hues have settled and your walls boast a fresh, captivating look, the journey doesn’t end there. Proper post-painting maintenance is essential to preserve the integrity of your wall paint design, especially in the diverse climate of South Africa, where sunlight and humidity can accelerate wear. Regular cleaning, tailored to the specific paint type, becomes the cornerstone of longevity. For instance, matte finishes require gentle dusting with a soft cloth, whereas semi-gloss or high-gloss surfaces can withstand more robust cleaning methods.
Understanding how to wall paint design also involves knowing how to care for your work without compromising its aesthetic appeal. Safe cleaning methods include using mild soap solutions and minimal water, avoiding abrasive scrubbers that can strip paint or create unsightly marks. For stubborn stains, spot cleaning with a soft sponge and gentle pressure often suffices, ensuring your design remains pristine. By adopting these meticulous cleaning practices, you extend the vibrancy and clarity of your wall art, turning your space into a lasting masterpiece that continues to inspire and delight.
Touch-Up Tips – Quick fixes for minor damages or fading
Even the most stunning wall paint design can lose its charm if neglected after the final stroke. Post-painting maintenance isn’t just about keeping your walls dust-free; it’s about preserving that vibrant personality you’ve infused into your space. In South Africa’s climate—where the sun can turn a once-bold accent wall into a dull shadow—regular care ensures your wall art remains a showstopper.
Minor damages and fading are inevitable, but quick fixes can work wonders. For small chips or scratches, a simple touch-up with matching paint can restore your masterpiece without the need for a full overhaul. When dealing with fading, especially on surfaces exposed to sunlight, consider applying a fresh coat or a protective sealant to rejuvenate the color. Remember, knowing how to wall paint design also involves understanding how to maintain it effortlessly over time.
- Prepare your touch-up kit with the original paint, a fine brush, and some sanding paper.
- Gently sand the damaged area for a smooth surface, then carefully apply the matching paint in thin layers.
- Allow sufficient drying time before assessing if another layer is needed for perfect blending.
For larger repairs or more stubborn blemishes, consulting a professional might save you from turning your wall into a patchwork quilt. Properly executed touch-ups ensure your wall paint design stays pristine, maintaining that eye-catching allure that makes any room uniquely yours. Because when it comes to wall art, a little maintenance goes a long way in keeping your space inspiring and fresh!
Inspiration and Trends in Wall Paint Design
Current Design Trends – Popular colors, patterns, and techniques
Wall paint design is evolving rapidly, blending bold experimentation with timeless elegance. Currently, popular colors such as earthy terracotta, muted pastels, and deep navy dominate the scene, offering a versatile palette for any space. Patterns like geometric shapes, abstract murals, and textured finishes are making a strong comeback, providing depth and personality to walls. Techniques such as sponge painting and stenciling allow for creative expression and can transform a plain wall into a statement piece.
Inspiration often comes from nature and contemporary art, pushing homeowners and designers to explore new ways of how to wall paint design effectively. Trending design elements include layered textures and subtle accent walls, which add visual interest without overwhelming the space. These trends demonstrate that understanding current design trends is crucial when planning your project, ensuring your wall paint design remains stylish and relevant.
Creative Ideas to Personalize Your Space – Incorporating murals, stencils, and textured finishes
Transforming a bare wall into a captivating focal point is an art that marries imagination with technique. When exploring how to wall paint design, inspiration often springs from the vibrant tapestry of nature or the bold strokes of contemporary art. Murals, in particular, bring a storytelling element to any space, turning a blank canvas into a visual masterpiece. Incorporating murals can evoke the serenity of a South African savannah or the lively hues of a bustling market—immediately infusing personality into your home.
Stencils and textured finishes offer an enchanting way to add depth and dimension without overwhelming the senses. For those seeking a personalized touch, layering techniques and subtle accent walls create visual intrigue while maintaining harmony. To elevate your project, consider using how to wall paint design approaches that blend these elements seamlessly, turning your walls into expressions of your unique style.
Creative ideas such as sponge painting and geometric patterns are gaining popularity, providing a playful yet sophisticated palette for decorating walls. Remember, the magic of how to wall paint design lies in the details—precise tape work and thoughtful layout can make all the difference. When every brushstroke echoes your personality, the result is not just a painted wall but a work of art that resonates deeply within your space.

0 Comments