
Understanding Wall Paint Drawing Basics
What Is Wall Paint Drawing?
A wall paint drawing starts where a coat of paint ends. In South African homes, this craft appears in subtle nursery murals and bold feature walls, yet the technique remains misunderstood. Wall paint drawing is the deliberate act of applying pigmented liquids to create a defined image, distinct from the broad washes of a fresh coat. It calls for a steady hand, a clear line, and a feel for how paint behaves on a vertical surface.
The practice sits between fine art and home improvement. A serious mural in Braamfontein and a decorative detail above a Durban fireplace rely on the same fundamentals: clean substrate, sealed surface, and a tested colour palette. The painter works in layers, letting each stroke build on the last while the image slowly emerges. The result is a permanent, personal marker on the home.
Choosing the Right Paint Type for Your Project
Every wall paint drawing begins with a decision most painters overlook: the binder. It dictates everything that follows. In Johannesburg’s dry Highveld climate, water-based acrylics behave differently from the solvent-based enamels favoured along the Cape coast. The substrate matters equally. Plaster, gypsum board, and old oil-gloss surfaces each demand a distinct approach.
For interior work, I have learned to trust a low-sheen acrylic emulsion! It levels well, minimises brush marks, and allows for quick corrections. The pigment load matters more than the colour name on the tin; a higher pigment concentration produces a truer result with fewer passes.
Match the medium to the room’s conditions:
- A porous surface requires a sealer before any pigment touches it.
- Moisture and direct sunlight extend drying times and shift the final tone.
- The detail density of your wall paint drawing dictates the brush size and paint consistency.
Durban’s humidity and Sandton’s dust demand different considerations entirely.
Essential Tools and Materials for Wall Art
Most wall paint drawing failures are not artistic failures. They are tool failures. A 2023 survey found that over 60% of first time wall murals in Gauteng showed visible roller marks or uneven pigment. The culprit? Cheap rollers and worn brush tips. I have never seen a good mural from a flimsy brush. Proper wall paint drawing begins with the right kit:
- A 50mm angled sash brush for crisp edges
- A 230mm microfibre roller for large fields
- A chalk line for accurate reference points
- Drop cloths and painter’s tape
Your tools must match the scale. A fine liner brush holds less pigment and dries out within minutes under Johannesburg’s summer heat. Work in smaller sections and keep a spray bottle nearby to extend working time! Pigment concentration matters, but so does the container. Use a sealable tray; exposure to Highveld dust ruins the finish.
Preparing the Wall Surface for a Smooth Finish
Most people treat a wall like a blank canvas. It is not. It is a map of every mistake ever made on it. Old paint drips, nail holes, and the ghost of a filing cabinet that once scraped its way across the room. Before any wall paint drawing begins, the surface demands attention.
Start with the obvious. Wash the wall with sugar soap and rinse thoroughly. Grease and grime reject paint like a cat rejects a bath. Then fill every dent with a quality filler and sand flat.
- Repair cracks wider than a matchstick
- Sand glossy areas to a dull finish
- Vacuum the dust, do not wipe it
Priming is non negotiable, especially on bare plaster. A sealed surface holds pigment evenly and prevents patches. A wall that feels like sandpaper will fight your brush the entire way. Smooth surface, smoother wall paint drawing, fewer regrets.
Creative Techniques for Wall Paint Drawing
Freehand Drawing: Expressing Your Artistic Style
There is a particular courage in freehand wall paint drawing. When you commit pigment directly to plaster, every line carries the weight of permanence. You cannot undo a stroke that has absorbed into the surface, and that finality changes how you see. The wall becomes a record of your hesitations and bold moves.
Freehand technique demands that you trust your eye over measurements. I have found that the most expressive wall paint drawing emerges when you let the brush drift, allowing slight irregularities to remain visible. Those imperfections are what make the artwork feel alive.
Consider these approaches:
- Continuous contour drawing, where the brush never leaves the surface
- Dry brush layering to build depth
- Negative space painting to define forms through absence
Each method alters the relationship between your gesture and the final image. The wall stops being a surface and becomes a partner in the process.
Using Stencils for Precision and Repeatable Patterns
Stencils transform wall paint drawing into an exercise in controlled repetition. In South African interiors, geometric patterns drawn from Ndebele art or Cape Dutch gables gain consistency when a cut template guides the brush. A misaligned stencil leaves a faint mark of pigment that forces you to start again. Preparation matters more than speed!
Consider these elements of the process:
- Low-tack masking tape holds the stencil flat and prevents paint bleed
- A stiff, dry brush dabbed vertically avoids sweeping strokes
- A few minutes of drying before lifting keeps the edges sharp
I have seen repeatable patterns create a rhythm across a corridor, each imprint sitting in perfect alignment with the last. Wall paint drawing no longer depends on steady hands alone. It becomes a collaboration between your eye and the template.
Tape Techniques for Crisp, Clean Edges
Tape controls the edge in wall paint drawing. When you press a strip of low-tack tape along a line, you are drawing a boundary that paint cannot cross. In Cape Town’s damp winters, moisture can creep under imperfectly sealed edges, so burnish the tape with a thumbnail before applying pigment. For wall paint drawing, tape offers a precision that freehand cannot. Here is the sequence I trust:
- Wait for the base coat to cure completely.
- Run a putty knife over the tape to seal it.
- Pull the tape at a 45 degree angle while the top coat is still damp.
That final peel reveals a line so exact it seems etched. The wall retains the tape’s impression, a sign of restraint. For a South African home, this technique turns a single accent wall into a study in discipline. Every crisp edge is a mark of control.
Adding Texture with Sponges and Rollers
The straight edge has its place, but texture is where a wall begins to breathe. Sponging and rolling introduce a physical depth that flat colour cannot achieve. These techniques are less about control and more about coaxing a surface into revealing its character. One method, known as colour washing, involves applying a thinned glaze over a base coat with a wide brush or roller, then softening it with a damp sponge. The result is a mottled, atmospheric effect that absorbs light differently throughout the day.
The process is straightforward, but the outcome is never guaranteed. This is the mystery of the medium. For a textured finish, I often find myself layering colours in a specific order:
– Start with a porous natural sea sponge for a soft, cloud-like pattern.
– Use a synthetic sponge for a sharper, more defined speckle.
– Finish with a short-nap roller for a subtle, sand-like grit.
Each tool leaves its own signature on the plaster. By varying the pressure and the direction of your hand, you can mimic weathered stone or aged suede. This approach to wall paint drawing feels less like painting and more like excavation, revealing what a flat finish hides. It is a process of building up and pulling back, where the final layer always holds a hint of the one beneath it. In a Cape Town home, this texture can mask minor surface flaws, adding a tactile richness that feels deliberate.
Faux Finishes That Mimic Stone, Wood, and More
Faux finishing borrows from geology. A wall can render the appearance of slate, granite, or aged timber using glazes, rags, and controlled strokes. This is wall paint drawing at its most deceptive. In a Johannesburg loft, a concrete column can pass for travertine without hauling a single slab.
The technique depends on layering translucent colour. A base coat dries, then a darker glaze is dragged with a brush to create grain. For stone, a feathering motion breaks up the pigment into veins. For wood, a comb produces annual rings.
With patience, the achievable effects grow:
- Limestone with a chalky patina
- Weathered oak with grey undertones
- Sandstone with a pitted surface
- Marble with dark veining
Each finish demands a different solvent ratio and drying time. Too much glaze and the effect muddies. Too little and the texture never emerges. The plaster remembers every pass.
Step-by-Step Guide to Creating a Wall Mural
Planning Your Design and Layout
Every wall has a secret desire to be a gallery, but few have the structural courtesy to be flat. In Cape Town, I once witnessed a mural of Table Mountain that accidentally included a light switch as a hiker. That is the cost of skipping the layout phase. Your wall paint drawing deserves better than guesswork.
Planning your design begins with photographing the surface and noting every outlet, corner, and crack. Then scale your sketch using a grid system. This is mundane, vital cartography for your creativity.
- Trace the wall’s perimeter onto graph paper.
- Divide both the paper and wall into equal squares.
- Transfer your design square by square, using chalk for temporary lines.
This method turns a sprawling canvas into manageable coordinates. The result is a mural that fits its architecture.
Transferring Your Sketch onto the Wall
With your grid aligned to the wall’s true vertical, the transfer becomes a ritual of patience. I start by marking reference points with a pencil, then chalk in the major shapes. This is where wall paint drawing reveals its discipline. The sketch on paper is a map, not a cage.
Use these steps:
Once the charcoal lines are down, you can adjust with a damp cloth. The wall forgives mistakes better than paper does.
Blocking in Base Colors and Layers
Blocking in base colors is where the wall paint drawing truly begins. I use a cheap housepainter’s brush for the first coat because the paint stays thick and honest. The goal is to cover the grid lines without overthinking. Lay down the darkest base first, then work lighter. For a recent mural on a Cape Town café wall, I mixed my own earth tones from raw umber and ochre. That first layer felt patchy. It always does. Let it dry completely.
Then come back with a second layer. This is where the wall paint drawing starts to breathe. Use a larger roller for open areas, but keep a brush for corners. Follow this order for each section:
- Start with the background shapes that sit farthest away.
- Move to the middle ground, overlapping edges while wet.
- Save foreground details for the final pass.
Work in sections and always pull the color from the center of the mural outward. The edges of your mask stay clean when you work this way.
Adding Fine Details and Highlights
Fine details turn a flat mural into a wall paint drawing with depth. After the base layers dry, I switch to a smaller brush and work in natural light. Highlights shape the final form. For a mural in Johannesburg, I used diluted white to catch the morning sun on window frames.
Follow this order for adding fine details:
- Load your brush sparingly to control the paint flow.
- Trace the light source across the composition.
- Add highlights where surfaces turn toward the light.
- Step back every ten minutes to judge the contrast.
Let each detail dry before adjusting. A dry surface accepts a second touch without muddying the colour. The final highlights should feel inevitable, not forced. This is where the wall paint drawing earns its depth.
Sealing and Protecting Your Finished Artwork
The difference between a mural that lasts five years and one that lasts twenty is a single coat. A wall paint drawing in Durban must shrug off salt air. One in Johannesburg fights dust and harsh UV. I use a water based acrylic varnish for interiors and a solvent based polyurethane for exteriors. The finish matters as much as the product, so choose carefully!
Surface prep comes first. Dust the wall with a dry microfiber cloth. Sand any raised specks gently. Check for drips. Then apply the clear barrier:
- Apply the first thin coat in a crisscross pattern.
- Wait four hours.
- Sand lightly with a 220 grit block.
- Apply the second coat.
Let it cure for seven days before washing. This barrier keeps the wall paint drawing strong. It also keeps colours from fading. The mural becomes a permanent part of the building.
Common Mistakes and Troubleshooting
Dealing with Paint Drips and Runs
A single paint drip can travel ten centimetres down a wall in the time it takes to walk across the room for a cloth. By the time you return, it has already set into the finish, leaving an untidy ridge that catches the light.
Drips, sags, and runs in wall paint drawing usually trace back to a few specific mistakes. The roller holds more pigment than the surface can absorb, or a damp section gets brushed again too early. Gravity pulls the excess into a vertical line that hardens within moments.
Common causes include:
- Overloading the roller beyond its absorption capacity
- Thinning the paint too aggressively with water
- Re-brushing an area that has already begun to set
Each of these produces raised ridges and pooled edges that disrupt the smooth appearance of the wall paint drawing.
Fixing Uneven Coverage and Patchy Areas
Uneven coverage appears like a quiet betrayal on a wall you believed was finished. One moment the surface hums with uniform colour; the next, a pale ghost of the previous coat stares through, or a darker cloud gathers where the roller paused to breathe. Patchiness rarely announces itself. It lives in the shadows of late afternoon light, in the sheen that catches at an odd angle, in the way a second coat refuses to unite with the first.
The cause usually lies in the rhythm of application. A roller that lands with a heavy hand in one corner, then whispers across the ceiling line, deposits pigment unevenly. A brush that drags through a semi-dry section lifts the paint rather than laying it down. The walls in older South African homes, particularly those with plaster that has seen decades of weather, absorb moisture at different rates across their surface.
– Work in full wall sections, from top to bottom, keeping a wet edge that never dries ahead of you.
– Load the roller evenly and use a light touch to distribute, never pressing hard enough to squeeze out the pigment.
– Wait for the first coat to cure completely before assessing, as flat paint dries lighter than its wet state suggests.
The fix begins with patience. Let the wall rest overnight, then run a hand across its surface. A rough spot needs a light sand, a smooth but transparent area needs another coat. The wall paint drawing process rewards those who check their work in natural light, walking from window to door to catch the imperfections that artificial bulbs hide. A second coat applied with the same pressure, the same direction of strokes, usually brings the colour into harmony. When patchiness persists, thin the paint by five percent with water and roll again, allowing the liquid to seep into the thirsty spots where the pigment refused to settle.
Correcting Color Mismatches and Mixing Errors
A colour mismatch in a wall paint drawing feels like a lie told by the light. I have learned to distrust the memory of a paint chip, because South African sunlight shifts every hue. Mixing errors often begin with an unmeasured splash of pigment, a half-remembered ratio, or the assumption that two tins from different suppliers share a soul.
- Adding pigment directly to the can without a scale
- Using leftover paint that has settled or separated
- Trusting the dry colour instead of testing on the wall
The correction demands honesty! Compare your mixture against the original swatch under natural daylight, not the store’s fluorescent hum. When the wall refuses to align, you must remix from scratch, keeping precise records of every drop. A small mismatch spreads across a full wall, so acknowledge the error early, before the paint dries into permanence.
Repairing Mistakes and Overlapping Lines
Overlapping lines are the most common failure in this craft. They happen when the brush reloads mid-stroke or the stencil shifts a hair during a second pass. South African walls, with their textured plaster, make the error worse because paint settles into the troughs unevenly. Every wall paint drawing bears the archaeology of its corrections.
Three common errors cause this trouble.
- Recoating before the base layer has cured
- Pulling tape while the paint still holds its shine
- Using a dry brush to feather a wet edge
Repair each mistake while it remains fresh. Wipe, sand, and recoat only when the surface is flat. Patience, not speed, earns a clean line.
Maintaining and Touching Up Your Wall Art Over Time
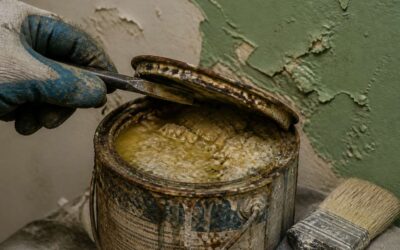
A wall paint drawing is never finished. Humidity and UV light conspire against even the most careful muralist. Over time, edges soften and colours settle into a patina you did not intend. The most common mistake is scrubbing the surface with a wet cloth, which lifts the binder. Another is storing leftover paint in a metal container, causing rust speckles that corrupt touch-up strokes. Watch for these symptoms before you act:
– Faint white chalkiness when wiped, meaning the binder is breaking down.
– Reappearing hairline cracks along the texture, a sign of thermal shock.
– A glossy patch where you already tried to retouch, proof of poor absorption.
Maintain your artwork by dusting with a dry microfibre cloth, then buff with a soft brush. For small chips, apply fresh paint with a damp sponge, not a bristle brush. Always test the old paint’s reaction to water before you begin; some South African plasters release hydroxide, which turns your correction into a pale halo. Keep a record of the exact colour ratio, because a wall paint drawing never matches perfectly once the original has aged.


0 Comments